Giving Checkmate. What an amazing feeling! And the goal of each and every game. But especially when starting out, easier said than done!
In this article, I will explain how to checkmate a lone King in the Endgame with different piece configurations. After reading this article you will be able to finish off your opponents in style. And you won’t have to worry anymore about stalemating them.
Basic Checkmates
Here are the most frequent basic checkmates you absolutely need to know, ranked from easiest to hardest:
- Queen + Queen
- Queen+Rook
- Rook+Rook
- Queen + King
- 2 Rooks
- Rook+King
Note that both Bishop + Bishop and Bishop + Knight checkmates are too advanced & happen way too seldom for you to study them that early. If you ever happen to have them in a game, this will be a good time to study them.
So now, let’s go over those checkmates one by one.
Queen + Queen Checkmate
Beware of stalemate with so much Power on the board. Note that your King should not join the action whenever you have more than just the bare Rook or Queen. The easiest way to checkmate with two Queens is the so-called staircase method.
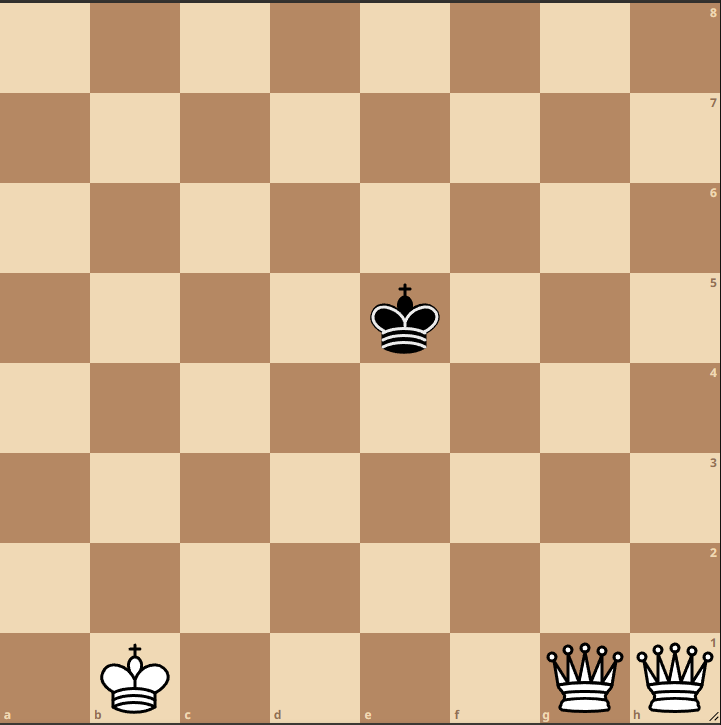
The most logical way to checkmate is Qg5+. If the King goes to the 6th rank, you continue Qhh6+ then Qgg7+, and Qhh8#. If the King advances to the 4th Rank, you go Qhh4+ Qgg3+ Qhh2+ Qgg1#.
Two key factors:
- Always give a check! This avoids annoying Stalemates.
- Don’t try to be as fast as possible. Follow the staircase method and you will be fine. Speed or style do not give extra points!
For example, if you have a slightly different starting position with the Queen on a7 instead of g1, I highly recommend going Qa7-g1 to prepare the staircase method. This won’t be the quickest way to checkmate. But who cares! Keep it simple. You can play through everything in the embedded Lichess study below.
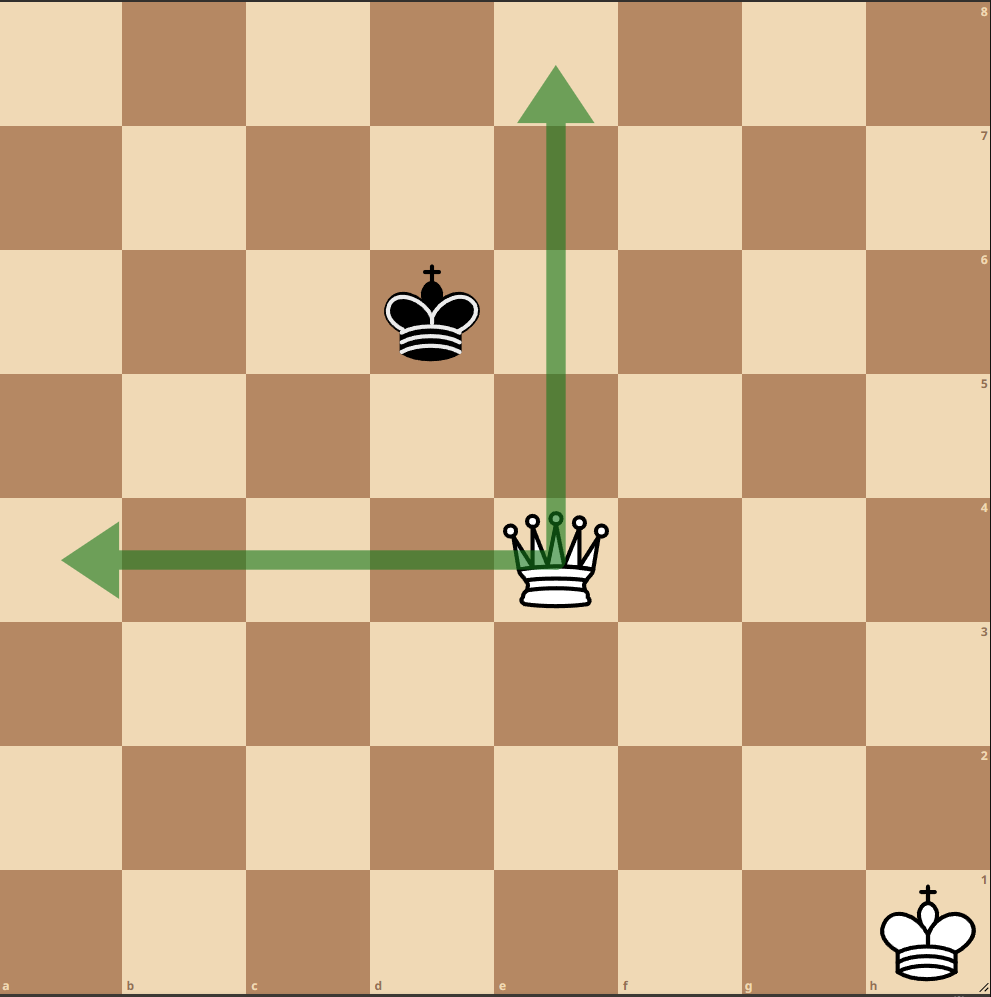
Queen + Rook Checkmate
This is very similar to the above. You want to cut off the king rank by rank (or file by file) by using the staircase method. Again, make sure to set up the staircase method and finish your opponent off by giving check after check.
Keep your King far away from the action, you won’t need him. Adding another piece just increases the likelihood of an unfortunate stalemate.
To keep everything safe and protected, make sure the Queen is further one file/rank further away from the opposing King than your Rook. This way your Queen can never hang and the Rook is always protected by the Queen.
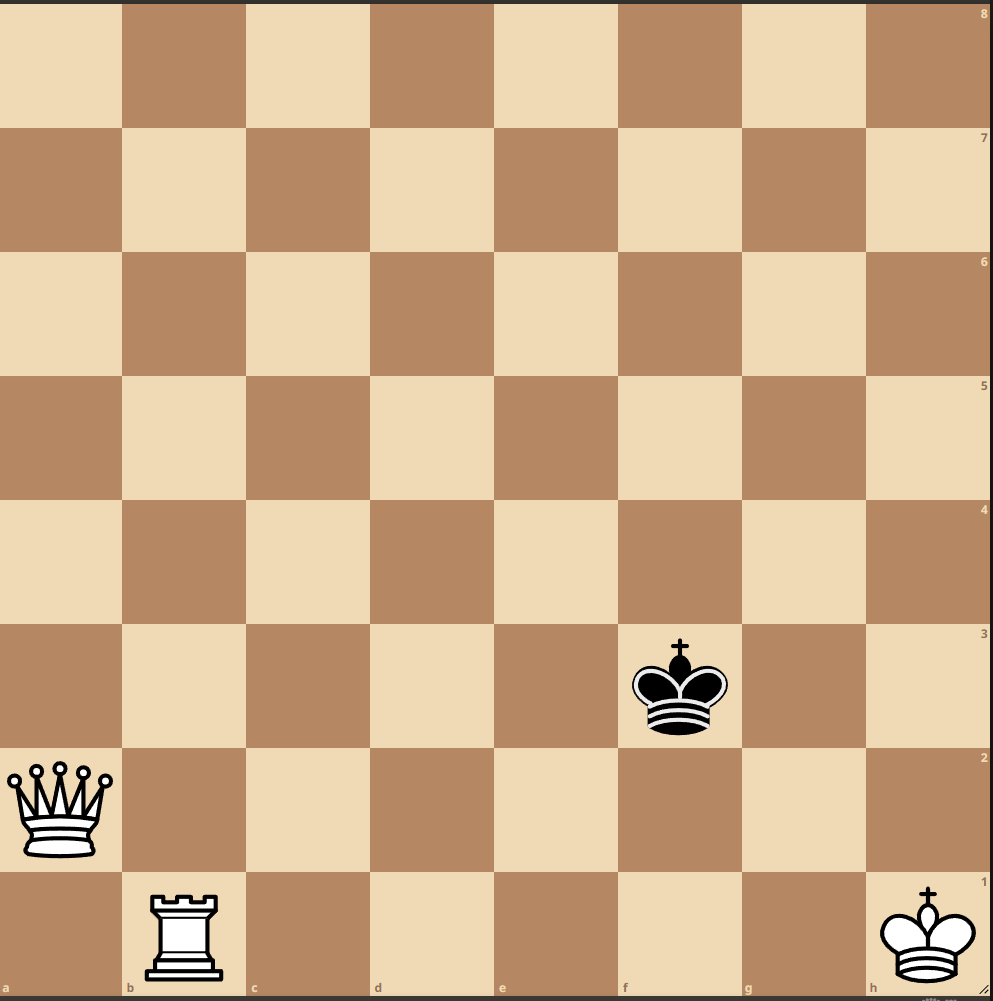
In this position, the staircase is again set up and you can go Rb3+, Qa4+, and so on until Qa8#. It is actually really that simple! Below everything in a Lichess study format:
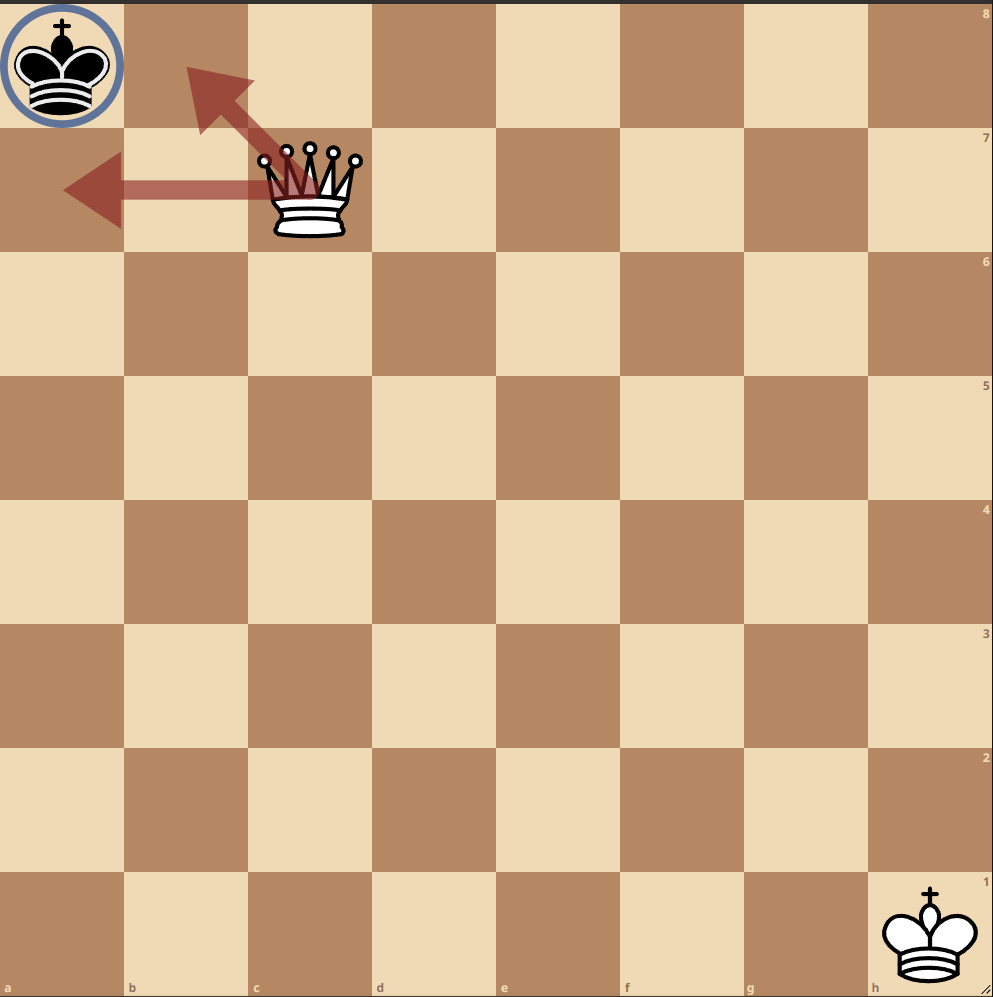
Rook + Rook Checkmate
Again a little less firepower, but still enough to apply the staircase method. The only difference is that Rooks do NOT protect each other. So you can’t just blindly give checks after setting up the staircase, because you might blunder your Rook.
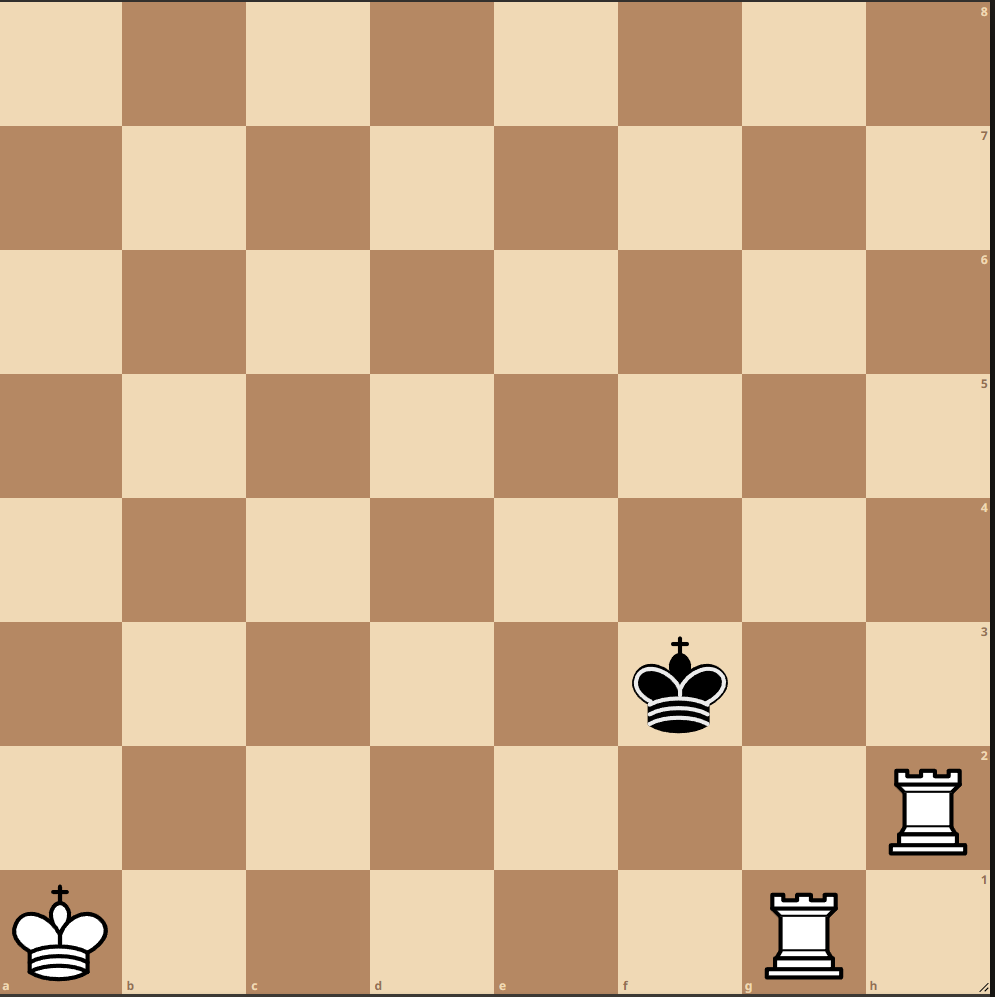
Now with a Queen on h2, you could just go Rg3+, Qh4+, etc. But that doesn’t work now. Both Rg3+ and Rf2+ are blundering a rook.
So be patient and put your rooks as far away as possible from the Black King. I would start with 1.Rg8. for example Kf4 2.Rh7 Kf5 3.Rf7+ Ke6 (attacks the rook!) 4.Rf1 Ke7 5.Rg2
Now you managed to get away from the annoying King and are ready for a nice checkmate.
This needs a little bit more patience, but again, speed is not the issue! As long as you keep your rooks safe you will checkmate Black’s King.
And the corresponding Lichess study. Make sure to play through this several times if it isn’t as clear as the two easier checkmates above.
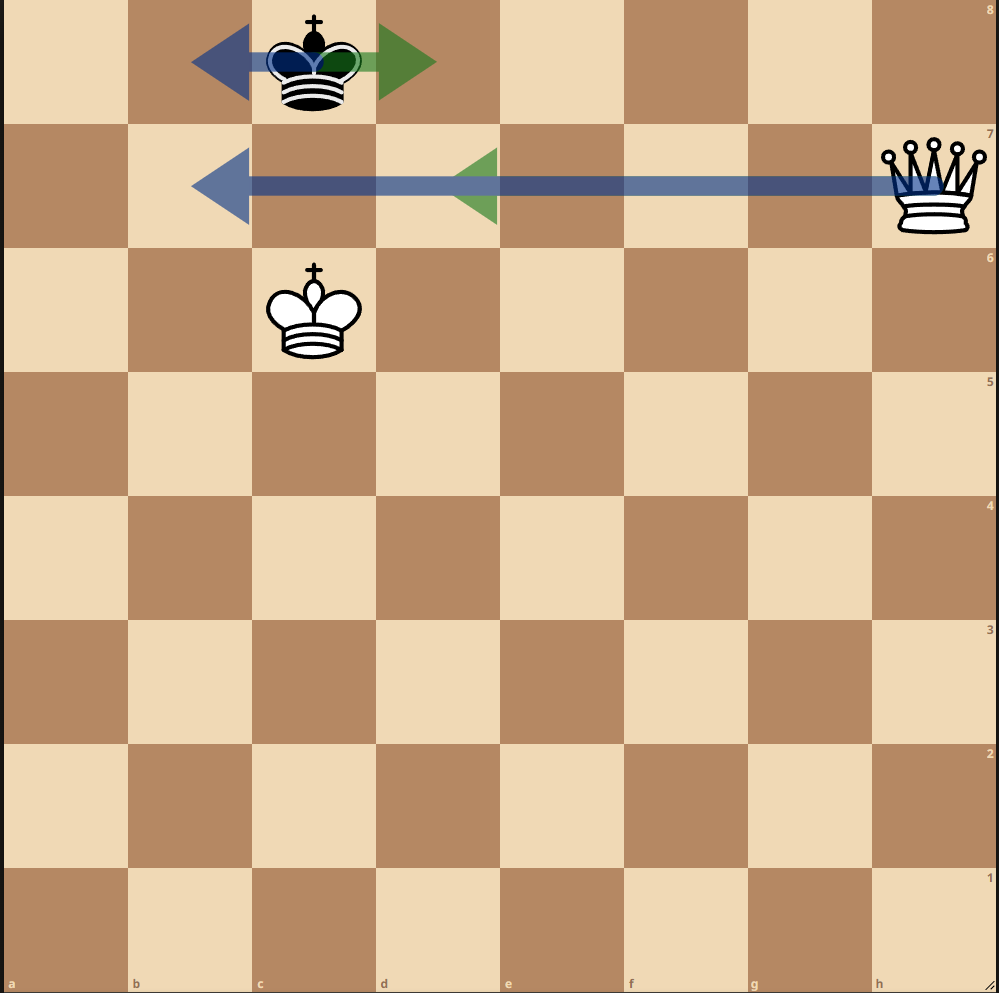
How To Checkmate With Queen + King
The lone Queen won’t checkmate the opposing King. So you need to activate your own King to finish the job. There are again two main issues: Blundering the Queen or stalemating. Two principles should avoid those issues:
- Keep your Queen always at a Knights distance from the opposing King
This is what we call a “box”. Black’s King can’t escape the Box the White Queen creates. If the black King steps back to d7, you can tighten the Box by playing Qe5!
- Once you cut the King off on the last file/rank, get the Queen as far away as possible! Only then join with your King and deliver the final blow.
Here are some of the most common stalemates you must avoid:
A lone Queen can’t checkmate the opposing King. But it can stalemate the King if he is in the corner of the board. In this case, you should NEVER be in a knight’s distance, because that would mean stalemate, as seen above (Qc2 vs Ka1, Qf2 vs Kh1 and Qf7 vs Kh8 are the same).
Make sure to really follow rule #2 above. Once you cut the King off along the last rank/file, get your Queen as far away as possible.

This stalemate with the ‘help’ of our own King happens way too often. Beginners are happy to threaten Qb7# but don’t realize black has no move anymore! Again, you want to keep your Queen far away once the King is on the 8th rank.
So how do you do it right instead?
- Tighten the box to the opposing King by putting your Queen in a Knights’ Distance.
- Cut off the King on the last file or rank of the board.
- Get your Queen further away to avoid stalemate.
- Bring your King in and put it in opposition to the opposing King.
- Checkmate by putting your Queen in front of their King, defended by your own King.
As always, the Lichess study for you to play through everything on your own time down below.
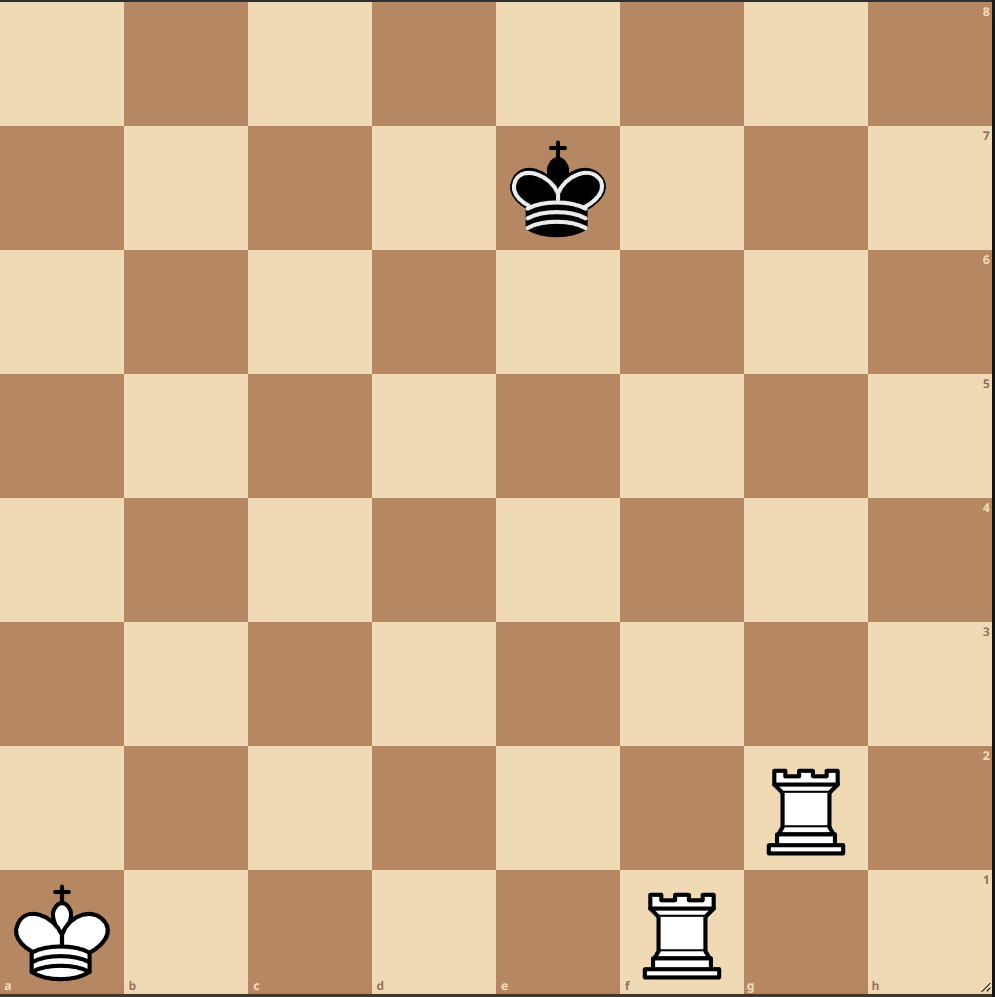
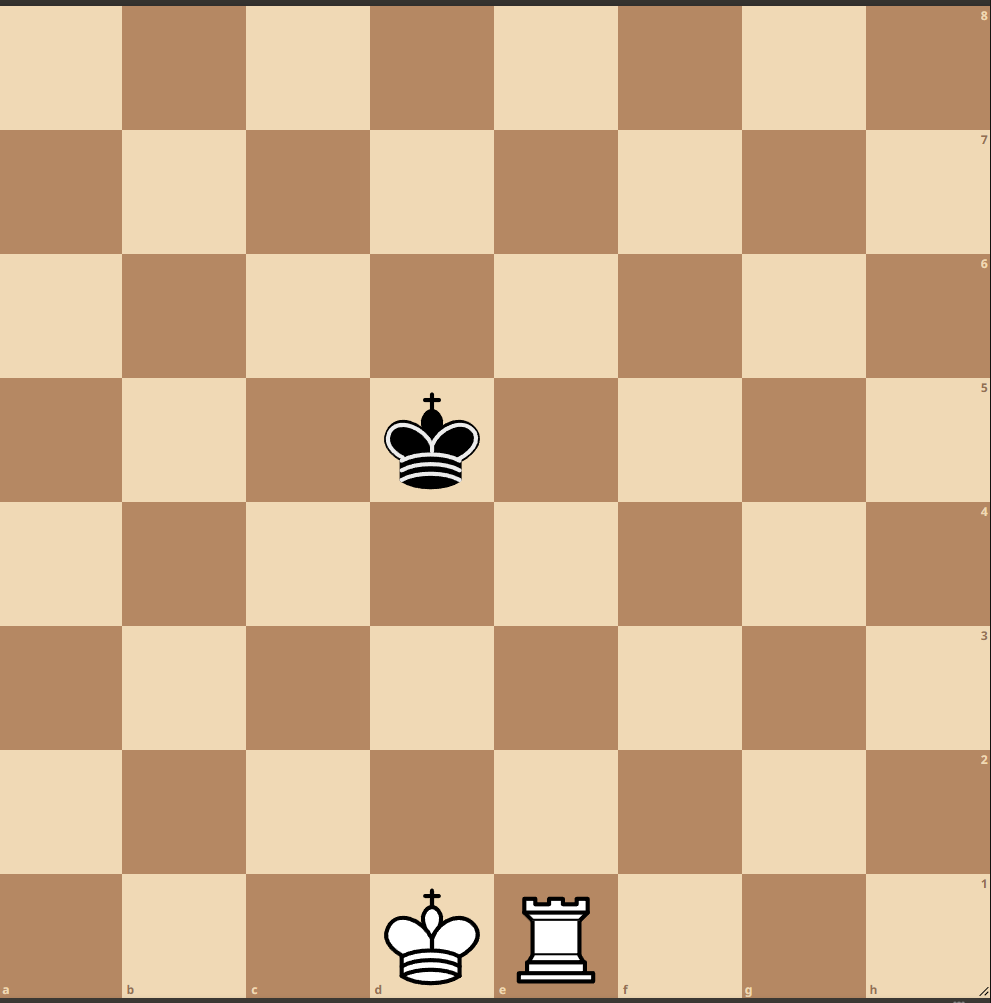
How To Checkmate With Rook + King
This is the hardest one, but you will get it, I’m sure. The key is again to use your Rook to create a Box for the opposing King. With the help of your King, you will be able to tighten that box, until you cut off the King on the last rank/file and then you are ready to deliver checkmate.
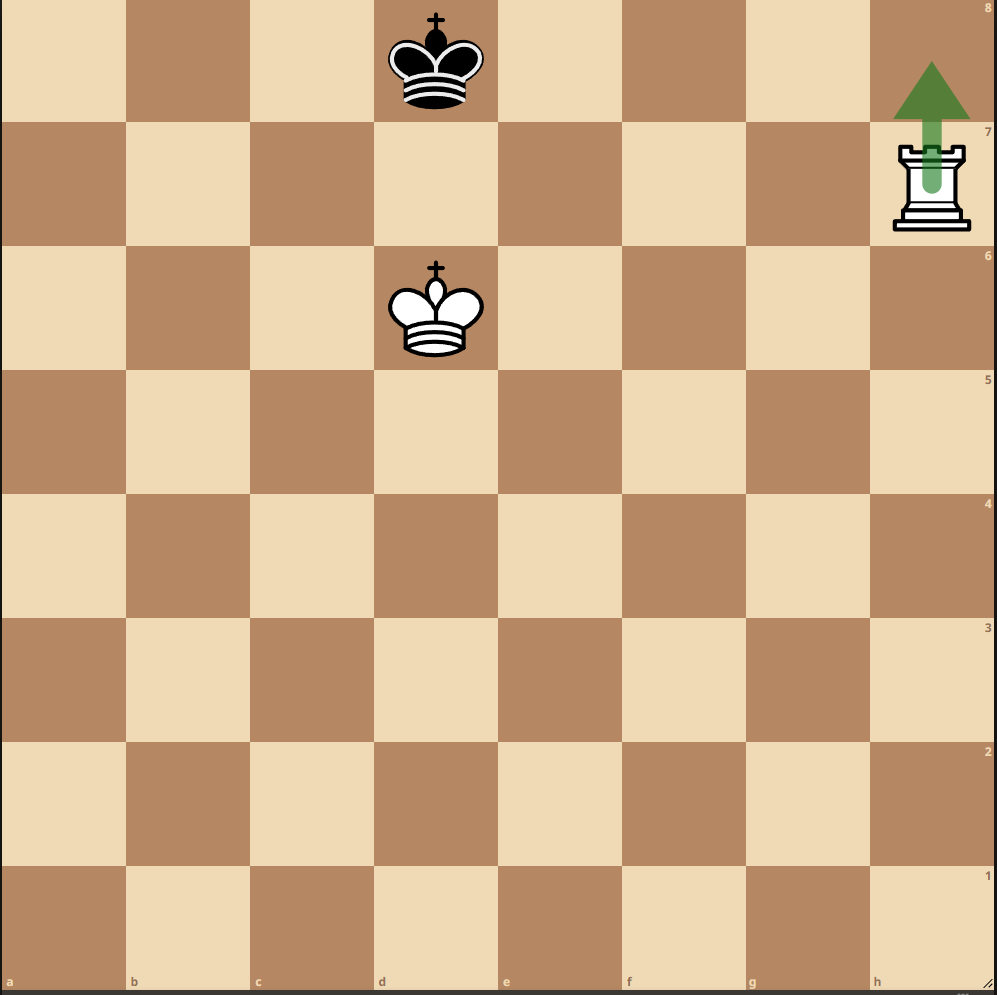
This is what we aim for. Your King has opposition and the Rook delivers the final blow by checking on the 8th rank. This also works on the h- or a-file and the 1st rank. For simplicity’s sake, I will write only 8th rank from now on. As your Rook can be attacked by the opposing King, you now need to bring your own King to help tighten the box.
Here is how you do it:
1.Re3 tightens the box the most. After Kd4 you can now go 2.Kd2! and support your Rook. After Black’s next move, you can either activate your King further or tighten the box with your Rook.
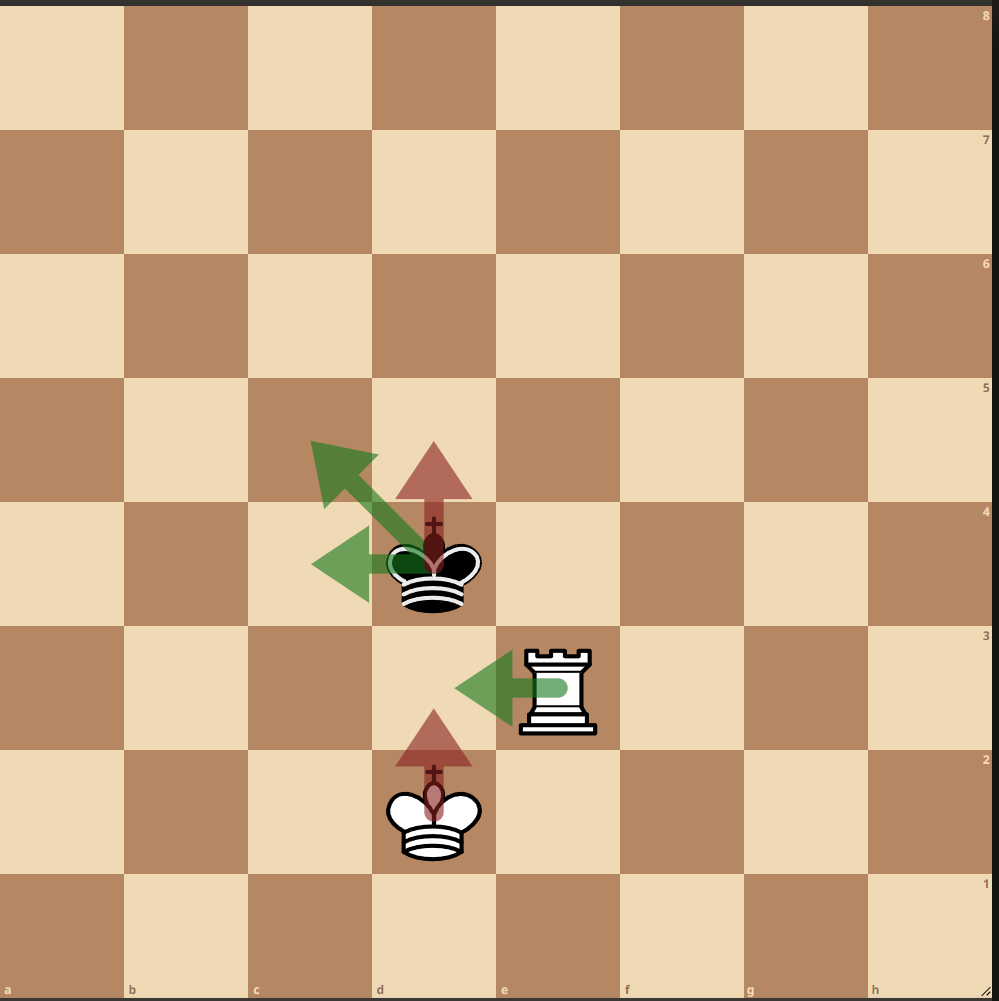
Continue this game until the Black king has no option but to step back on the last rank. Then cut the King off with the Rook on the 7th rank. Now you are ready to get opposition and deliver the final blow with a check on the 8th rank as shown above.
But getting the opposition is not so easy! Because your opponent will move away if you try to step into the opposition and likely does not walk into the opposition of their own free will. Here we need one last trick: Losing a tempo with your rook & then following the opposing King with your own at a Knights distance.
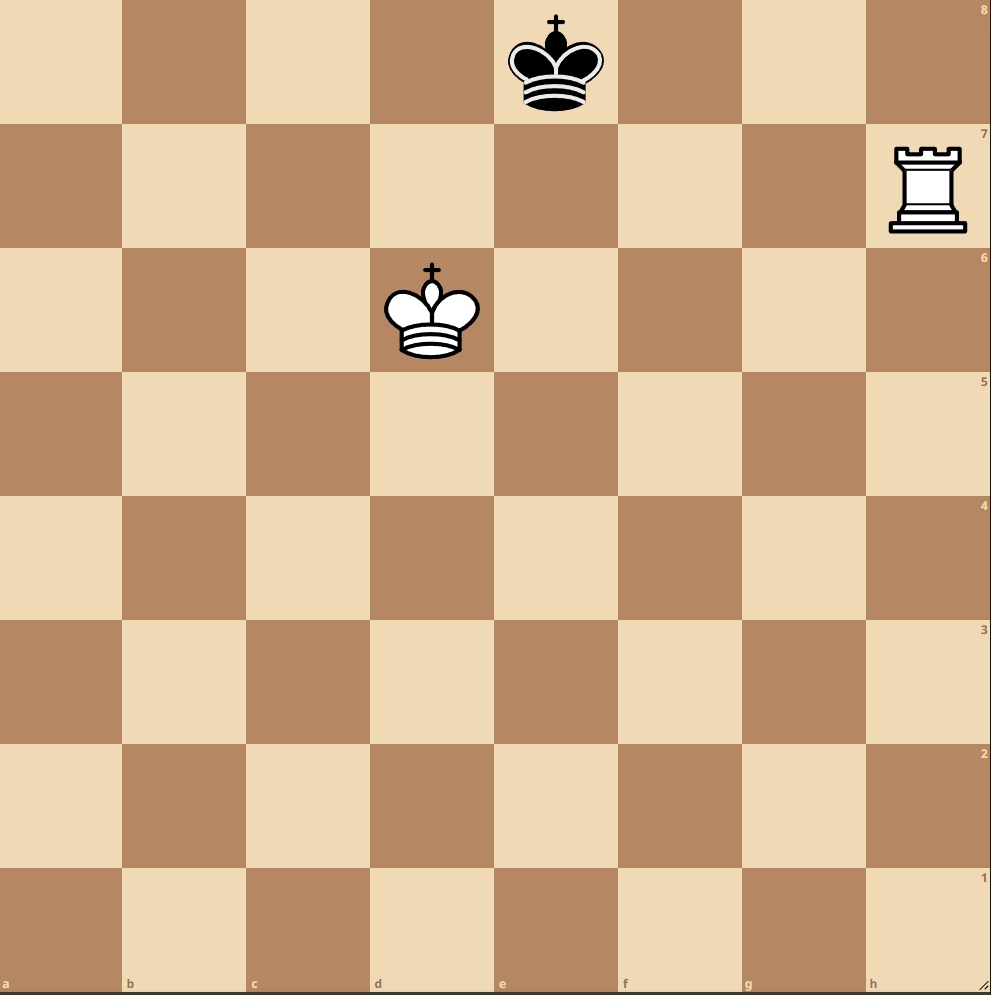
If we keep following the Black King by Ke6 he will run away with Kf8 etc. That’s why we use our rook to force our opponent to make a move. Ra7! is smart. This way the rook is not going to be attacked by a later Kg8.
Now, Kd8 is checkmate after Ra8#, so Black needs to play Kf8. And now follow the black King with your own King at a Knights distance: Ke6. Black has the same issue: Ke8 leads to checkmate, so they play Kg8. With Kf6 we now force the black King into the corner and after Kg6 there is no escape anymore.
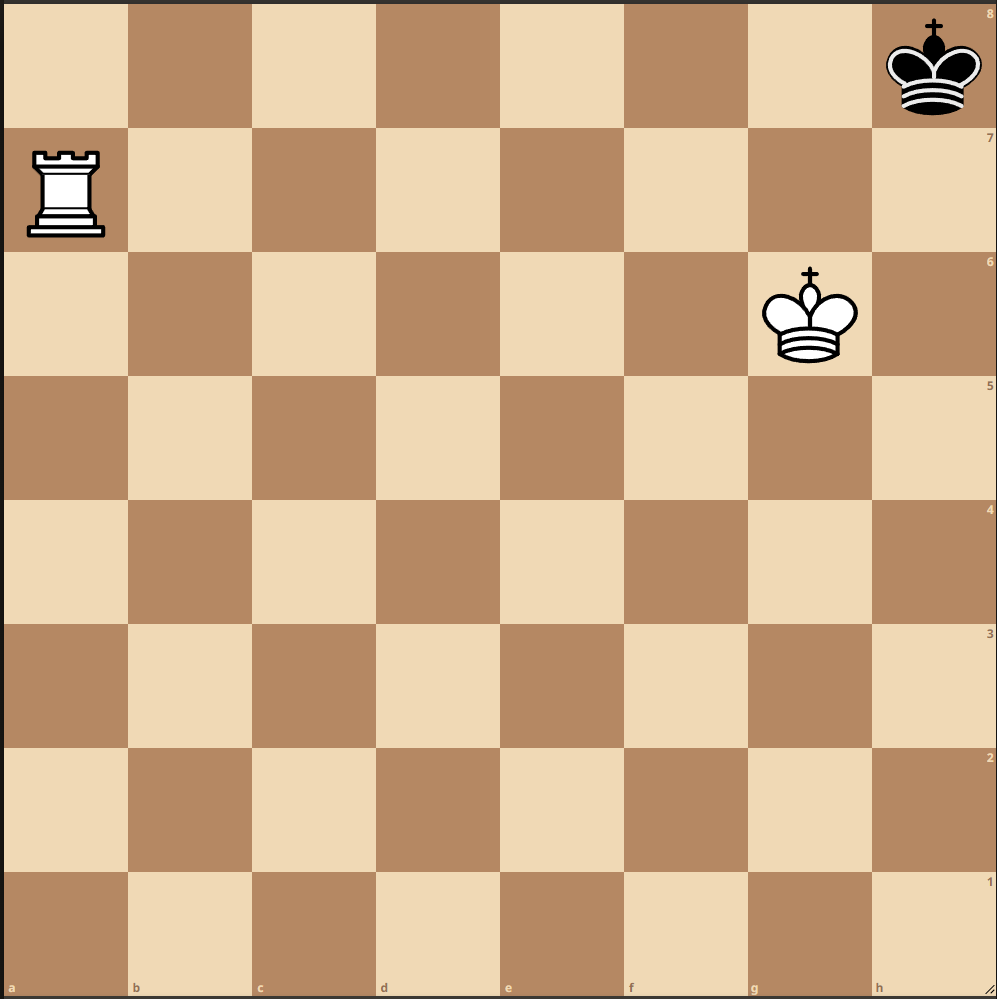
There is only one move for black: Kg8 and now we deliver checkmate with Ra8#. And now it is time to play through all of that using my Lichess study:
Checkmate The Lone King
Congratulations! You now know how to checkmate the lone King having a Rook or more material on the board. Now it is time to practice giving those checkmates in a real game. Remember the two key ideas:
- Staircase Mate (Two Rooks, two Queens, or Rook+Queen) and
- Putting the King in a Box (Queen + King or Rook + King)
whenever you are in the fortunate position to be this much material up at the end of a game.
Don’t worry if you mess this up once or twice still. Nobody is perfect from the get-go. The key is to learn from one’s mistakes. Carefully review every game you play when you end up in a situation we discussed in this article. If you did something wrong, ask yourself: what can I do better next time?
If you are unsure, you can always come back to this article or review everything explained in the public Lichess study I created for this article. Soon enough, checkmating the lone King will be second nature for you.


